
How to Build a Two Layer Futures Crypto Trading Bot with Origami Tech

Introduction
In this guide, we will build a position aware futures bot in Origami Tech from scratch. The strategy uses one minute RSI data to open long or short positions, adds to an existing position after a defined price movement, and closes the full position at a specified profit target.
The logic is divided into two grid layers:
- An opening and averaging layer
- A Reduce Only closing layer
This separation keeps each part of the crypto bot trading strategy easier to configure, test, and manage.
In this guide, you will learn how to:
- Create a workspace and connect an exchange account
- Create a futures crypto trading bot in One Way position mode
- Configure buy and sell outputs
- Use RSI signals from one minute candles
- Make the bot respond to the current position
- Add averaging logic around the break even price
- Create a separate Reduce Only layer for exits
- Review the simulation and run the bot
Before you begin, remember that a crypto trading bot automates execution, not results. RSI thresholds, averaging rules, and profit targets do not guarantee profitable performance. Test the logic carefully and use an amount you can afford to risk.
How Grid Layers Work in Origami Tech
In Origami Tech, a grid is a layer of strategy logic. It does not have to represent a conventional grid trading strategy with many fixed orders distributed across a price range.
Each layer can perform a separate task. For example, one layer may quote close to the market, another may place orders across a wider range, and a third may manage profit taking or risk controls. Layers can also be enabled and disabled independently.
The bot in this guide uses two layers because entries and exits have different requirements. The first layer can increase exposure. The second layer can only reduce it.
This structure is useful when building a futures grid bot because it avoids placing all conditions, prices, quantities, and position checks inside one large expression.
The Crypto Bot Trading Strategy Used in This Guide
The example was created for a futures market on Extended using One Way position mode and the PUMP crypto trading pair.
The bot follows these rules:
- It evaluates RSI on one minute candles.
- It prepares a long entry when RSI is at or below 30.
- It prepares a short entry when RSI is at or above 70.
- It places one buy order and one sell order.
- Each initial order represents approximately $20 of value in the example.
- If a position already exists, the bot may add to it after price moves 1% away from its break even price and the relevant RSI condition is met.
- A second layer closes the full position at a configurable profit target.
- The closing layer uses Reduce Only so an exit order cannot open exposure in the opposite direction.
These values demonstrate the workflow. They are not recommended settings for every market.
Step 1: Create a Workspace
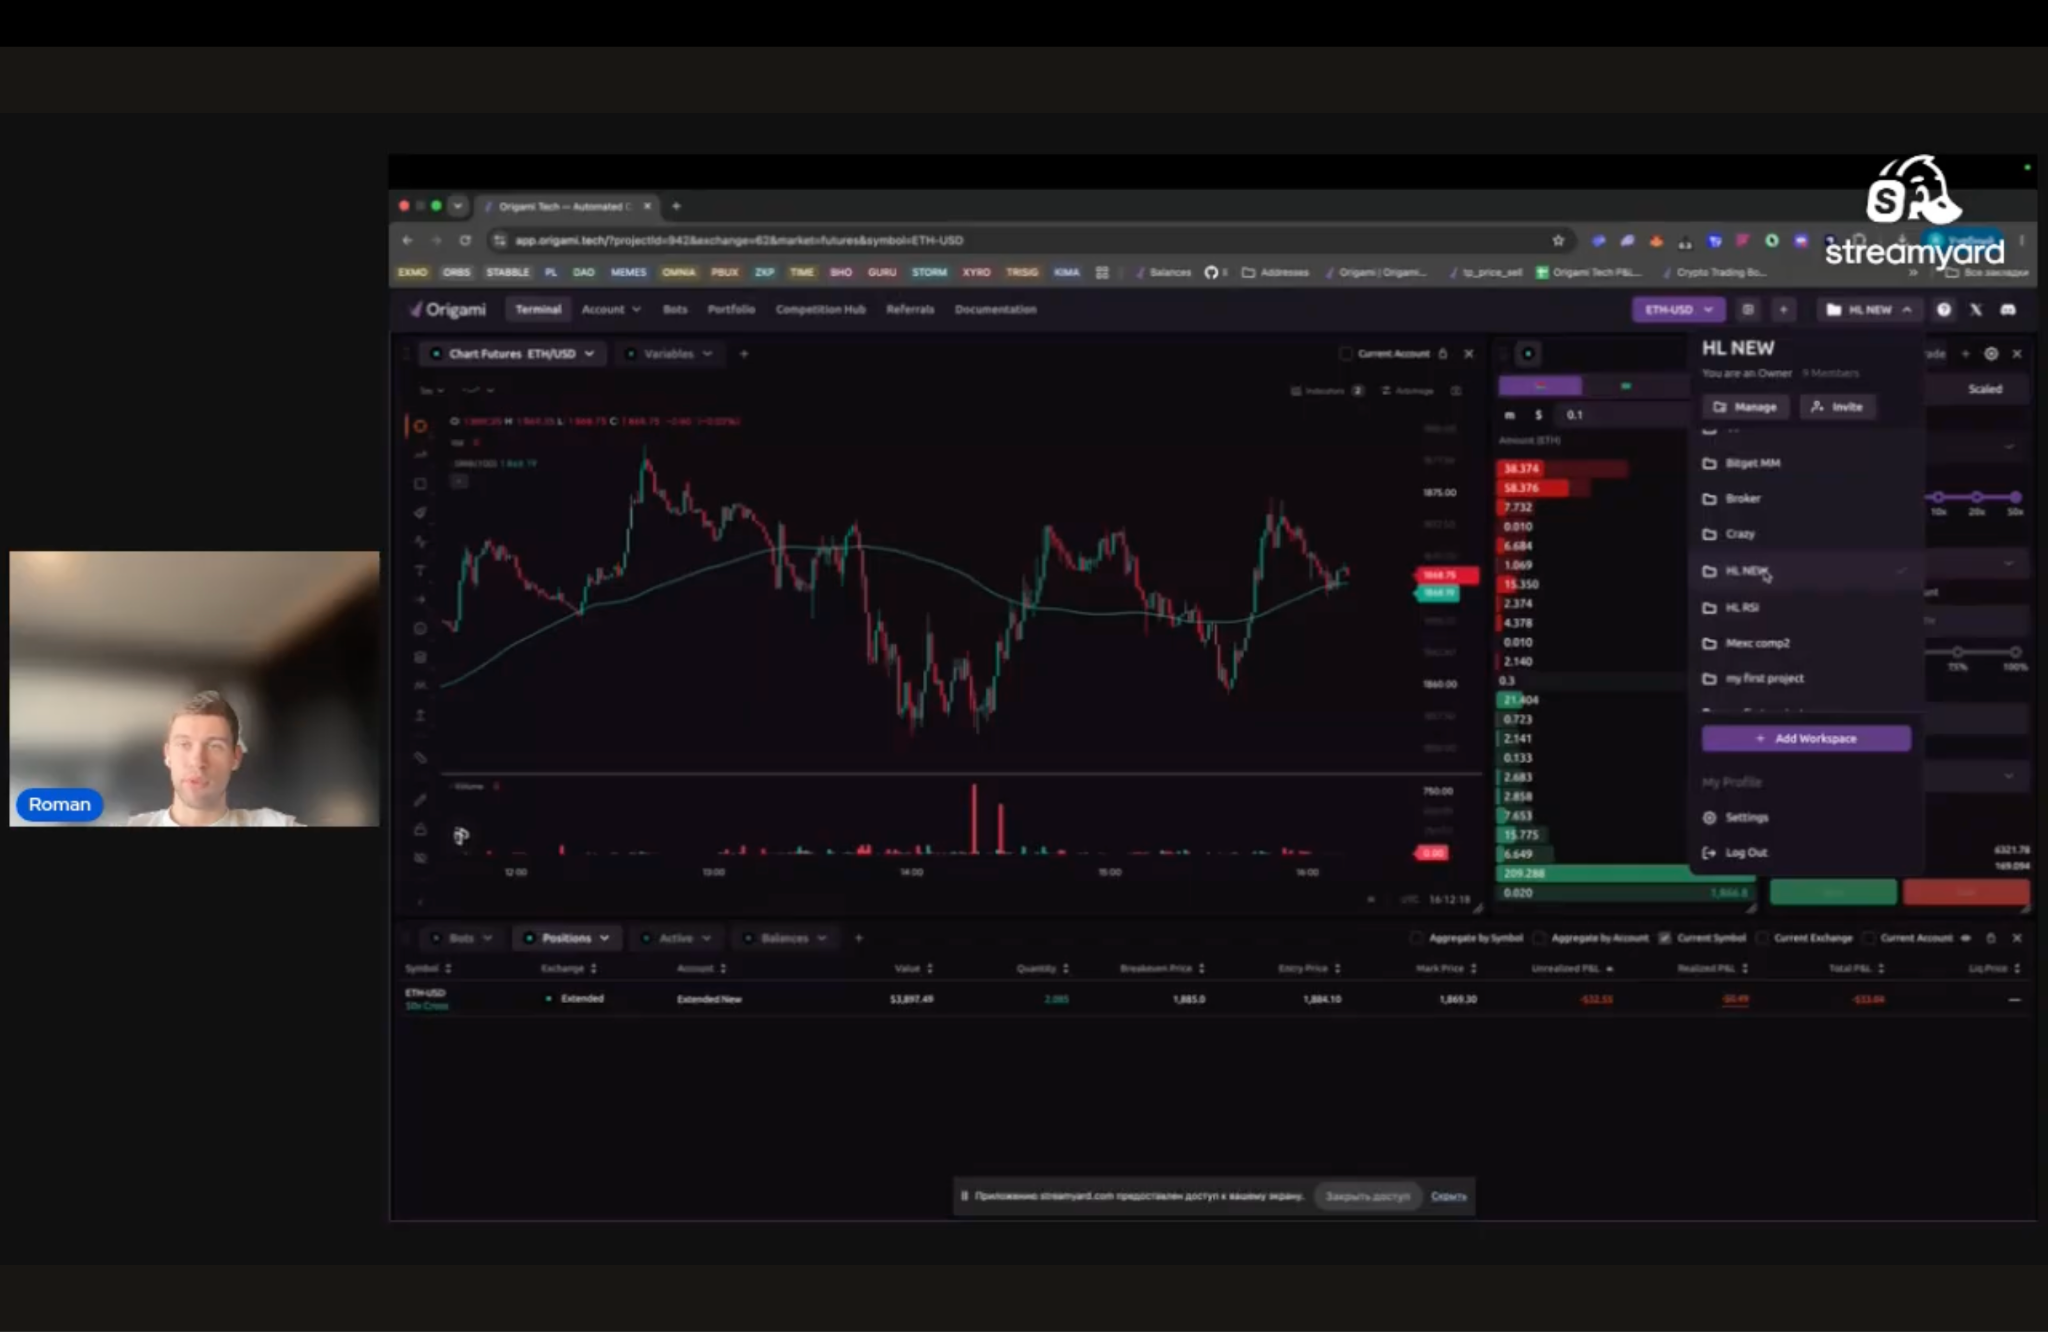
After registering with Origami Tech, create a workspace.
A workspace groups the accounts, bots, layouts, and permissions used for a particular crypto trading setup. Team members can be assigned Admin, Editor, Viewer, or Analyst roles. Admins can manage bots and add accounts.
If you already have a workspace, open it and continue to the account setup.
Step 2: Connect Your Exchange Account
Open the account menu and click Add Account. Select the exchange you want to use and complete its connection flow.
The exact process depends on the venue:
- A centralized exchange may require API credentials and the Origami Tech IP addresses to be added to its whitelist.
- A supported decentralized exchange usually uses a wallet connection.
Before creating the bot, confirm that the account has enough available balance and that the selected market is enabled for futures crypto trading.
Step 3: Create a Futures Crypto Trading Bot
Go to the Bots page and click Add Bot.
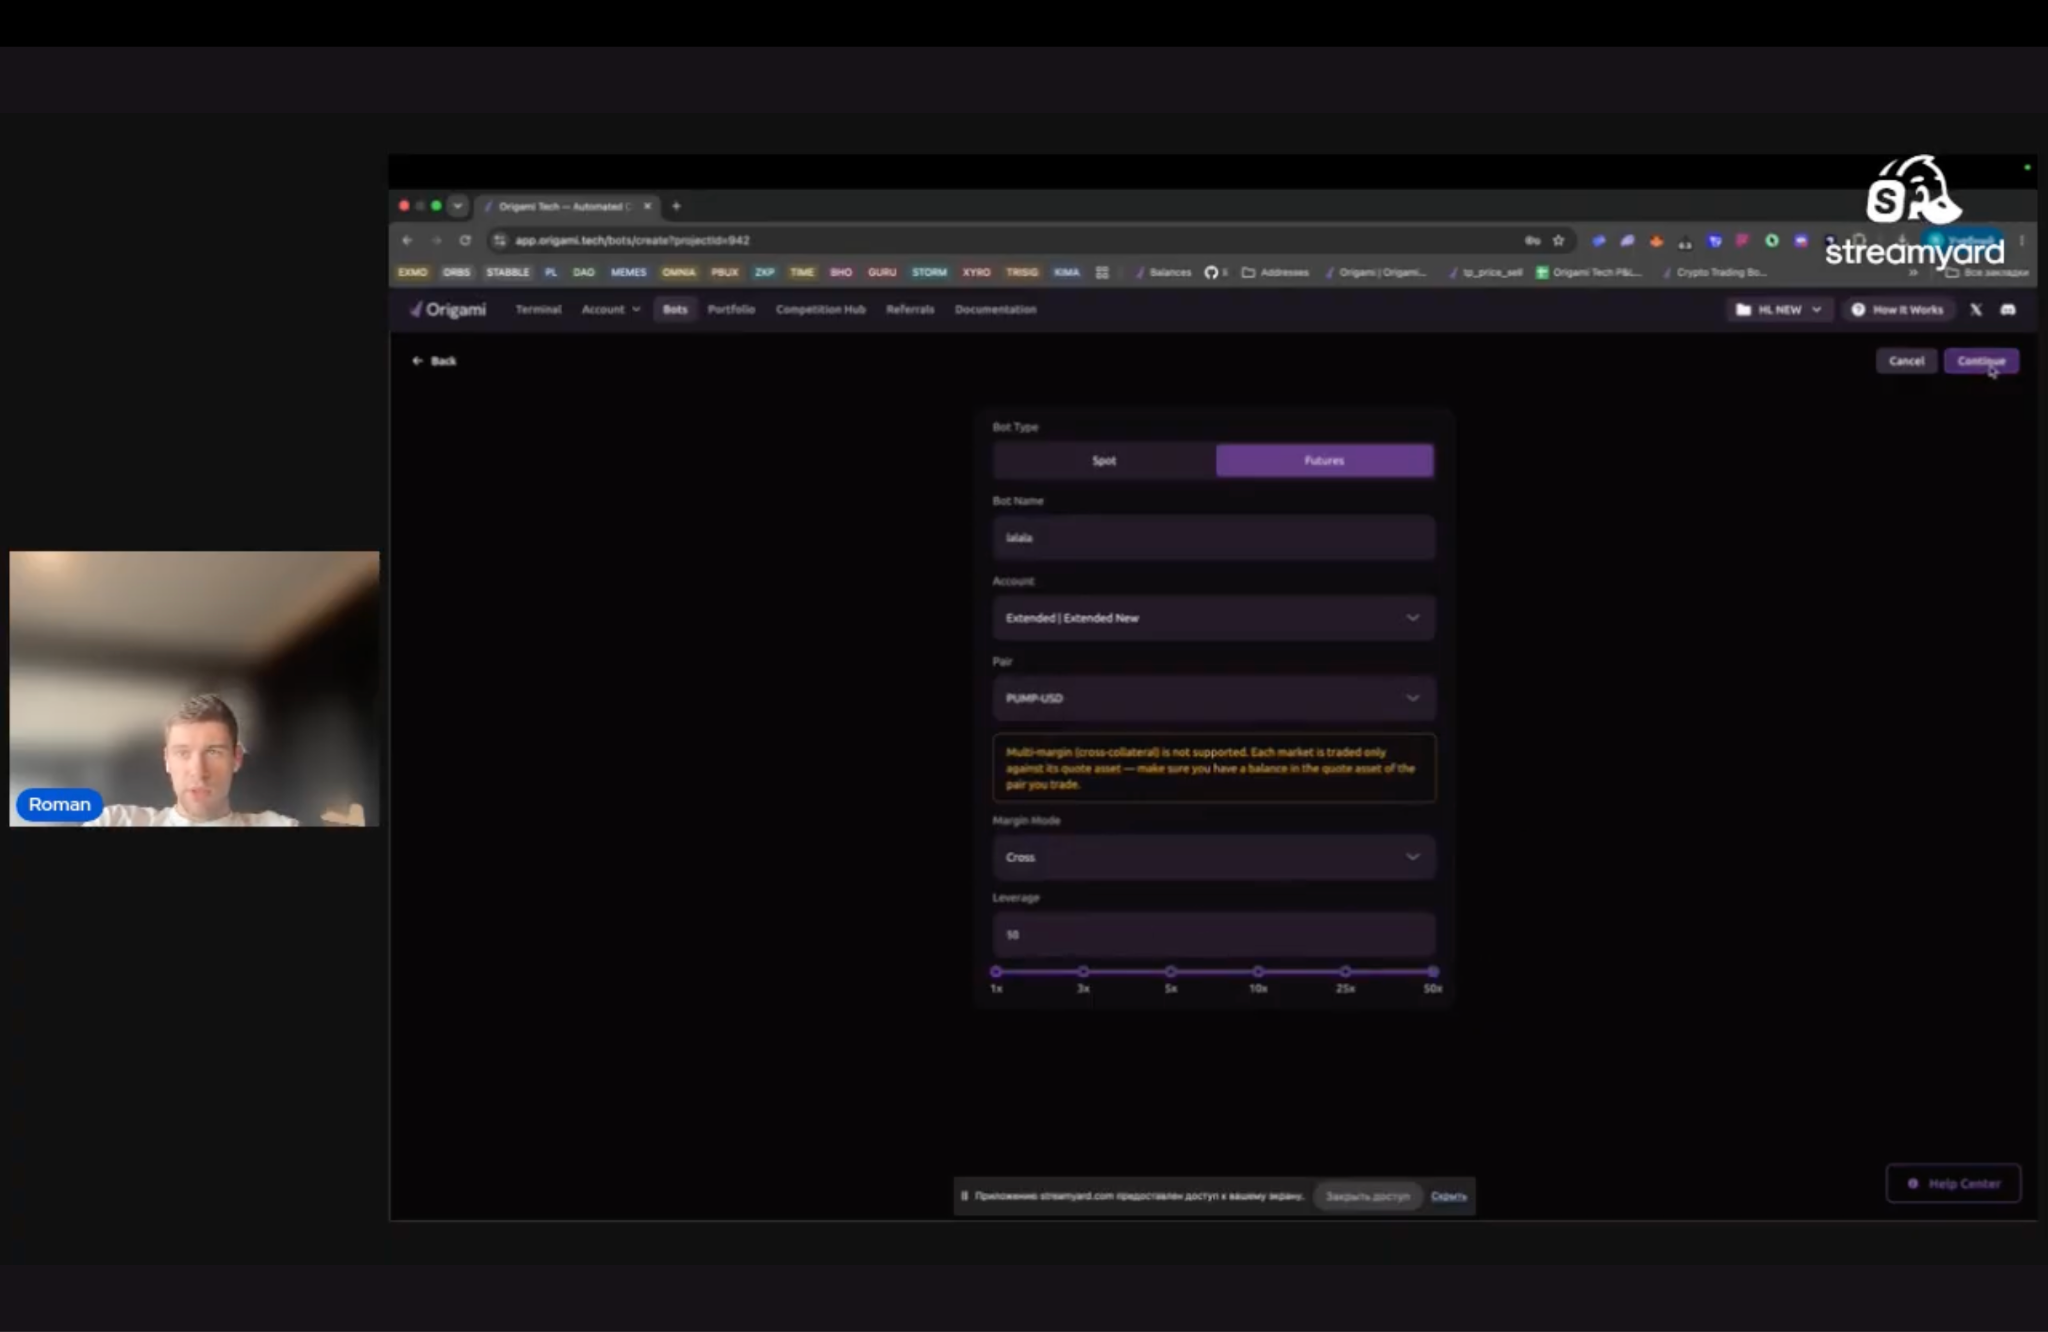
Choose the following setup:
- Market type: Futures
- Account: your connected Extended account
- Position mode: One Way
- Crypto trading pair: PUMP/USD
- Margin mode: Cross
- Bot name: any clear name for the strategy
- Leverage: 10x in this example
Then click Continue.
Position mode matters. One Way mode maintains a single net position for the instrument. Hedge Mode can maintain long and short positions at the same time on venues that support it. The logic in this guide is designed for One Way mode and should not be transferred to Hedge Mode without adapting its position checks.
Extended does not support multi margin or cross collateral for this setup. Each market is traded against its quote asset, so the account must hold enough of the relevant quote asset before the bot starts.
The 10x leverage used in this example demonstrates the setup and should not be treated as a recommended value.
Step 4: Start with a Preset or Build from Scratch
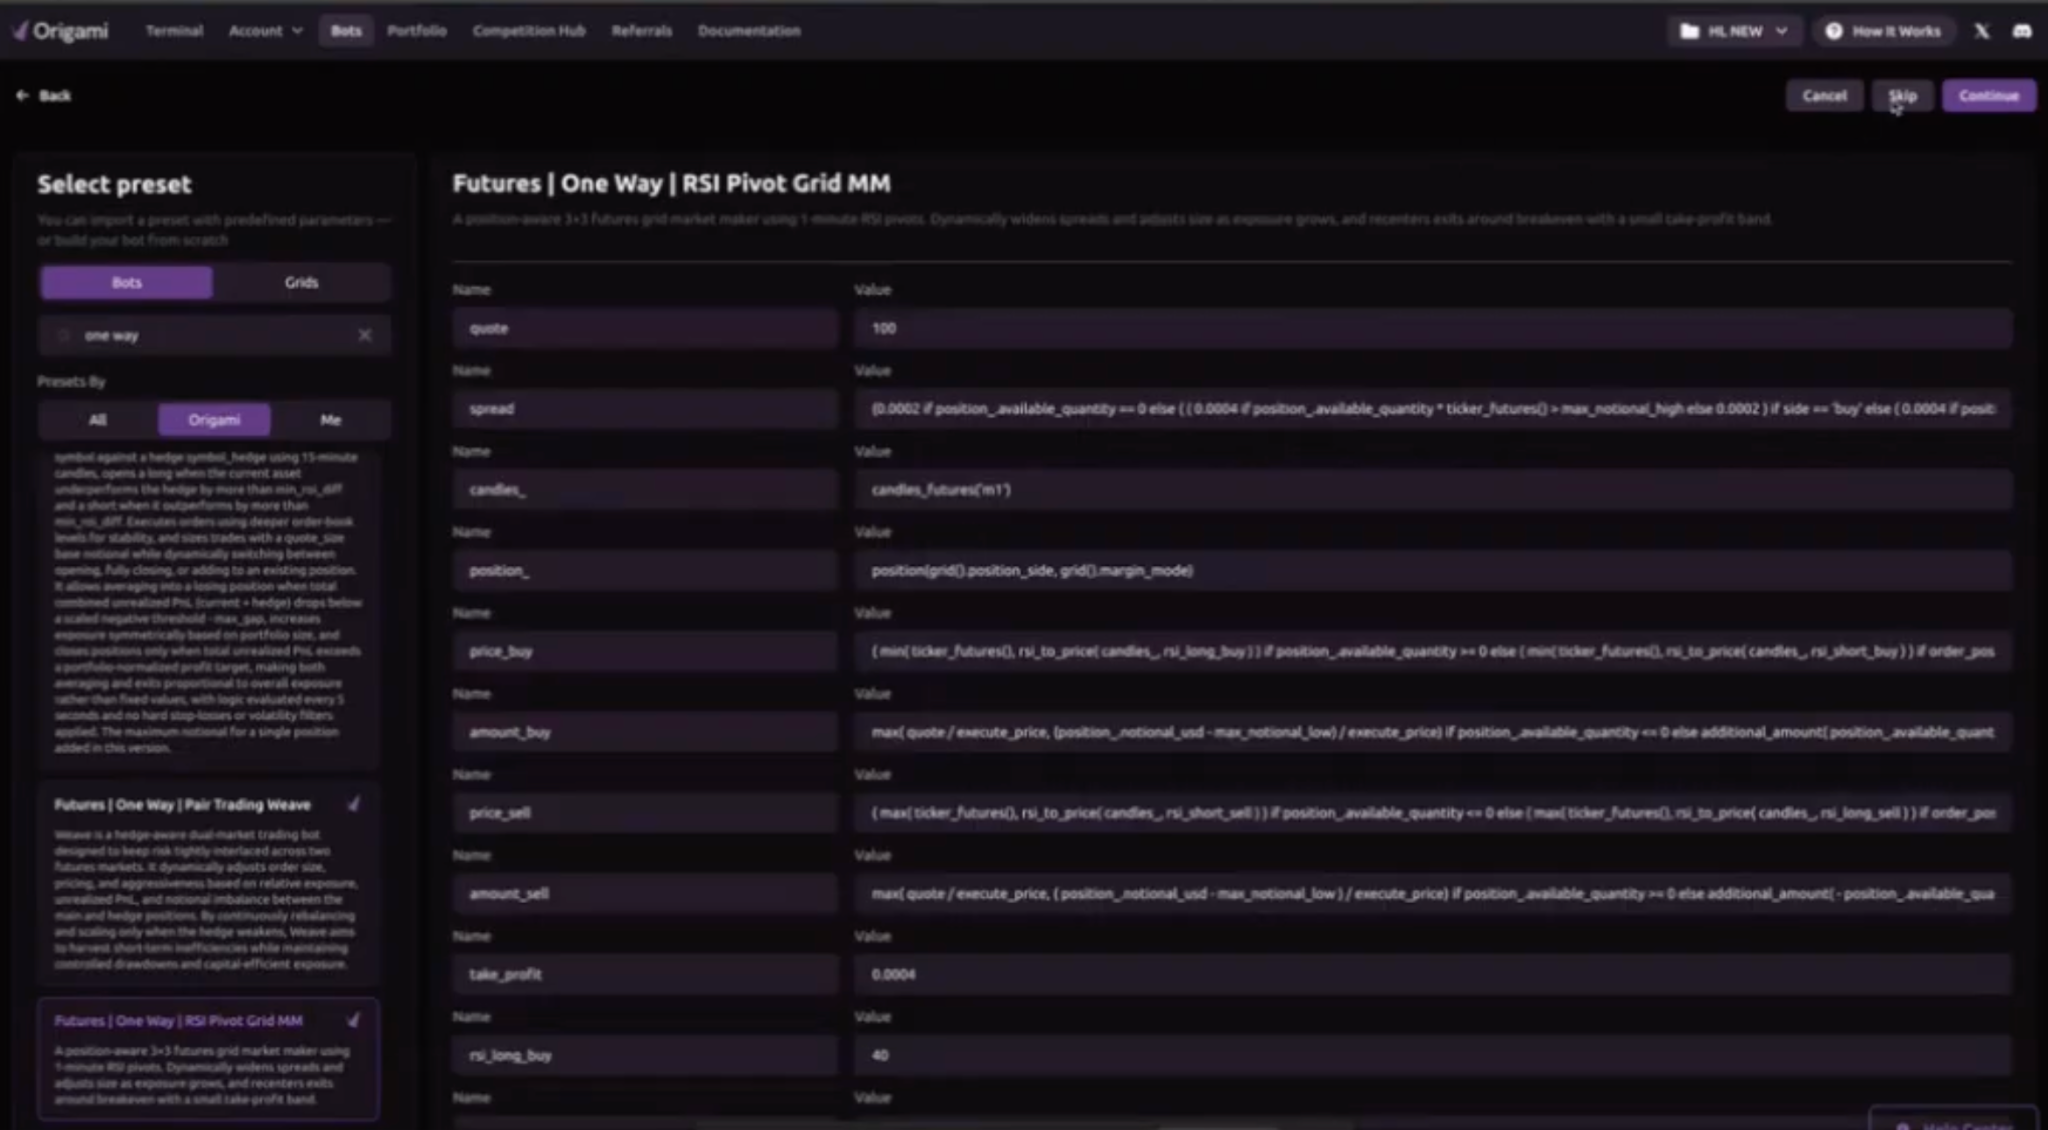
Origami Tech provides crypto trading strategy presets that can be imported and adjusted. A preset can help you understand the available inputs, functions, and outputs, but it should not be treated as a promise of returns.
For this guide, create the strategy from scratch. Open the bot editor, remove the existing grid layers if necessary, and add a new grid layer.
You can also review the Futures | One Way | RSI Pivot Grid MM preset before building your own configuration. It uses one minute RSI pivots, adjusts its spread and order size as exposure changes, and places exit orders around the break even price with a small take profit band.
Step 5: Configure the Required Grid Outputs
Every grid layer requires four outputs:
- Execute Price
- Order Amounts
- Buy Order Count
- Sell Order Count
Start by creating separate variables for buy and sell prices and amounts. Then route the output according to the order side. The execute_price output uses price_buy for a buy order and price_sell for a sell order. The corresponding amount is returned through execute_volume.
For this example, set both the buy order count and sell order count to one.
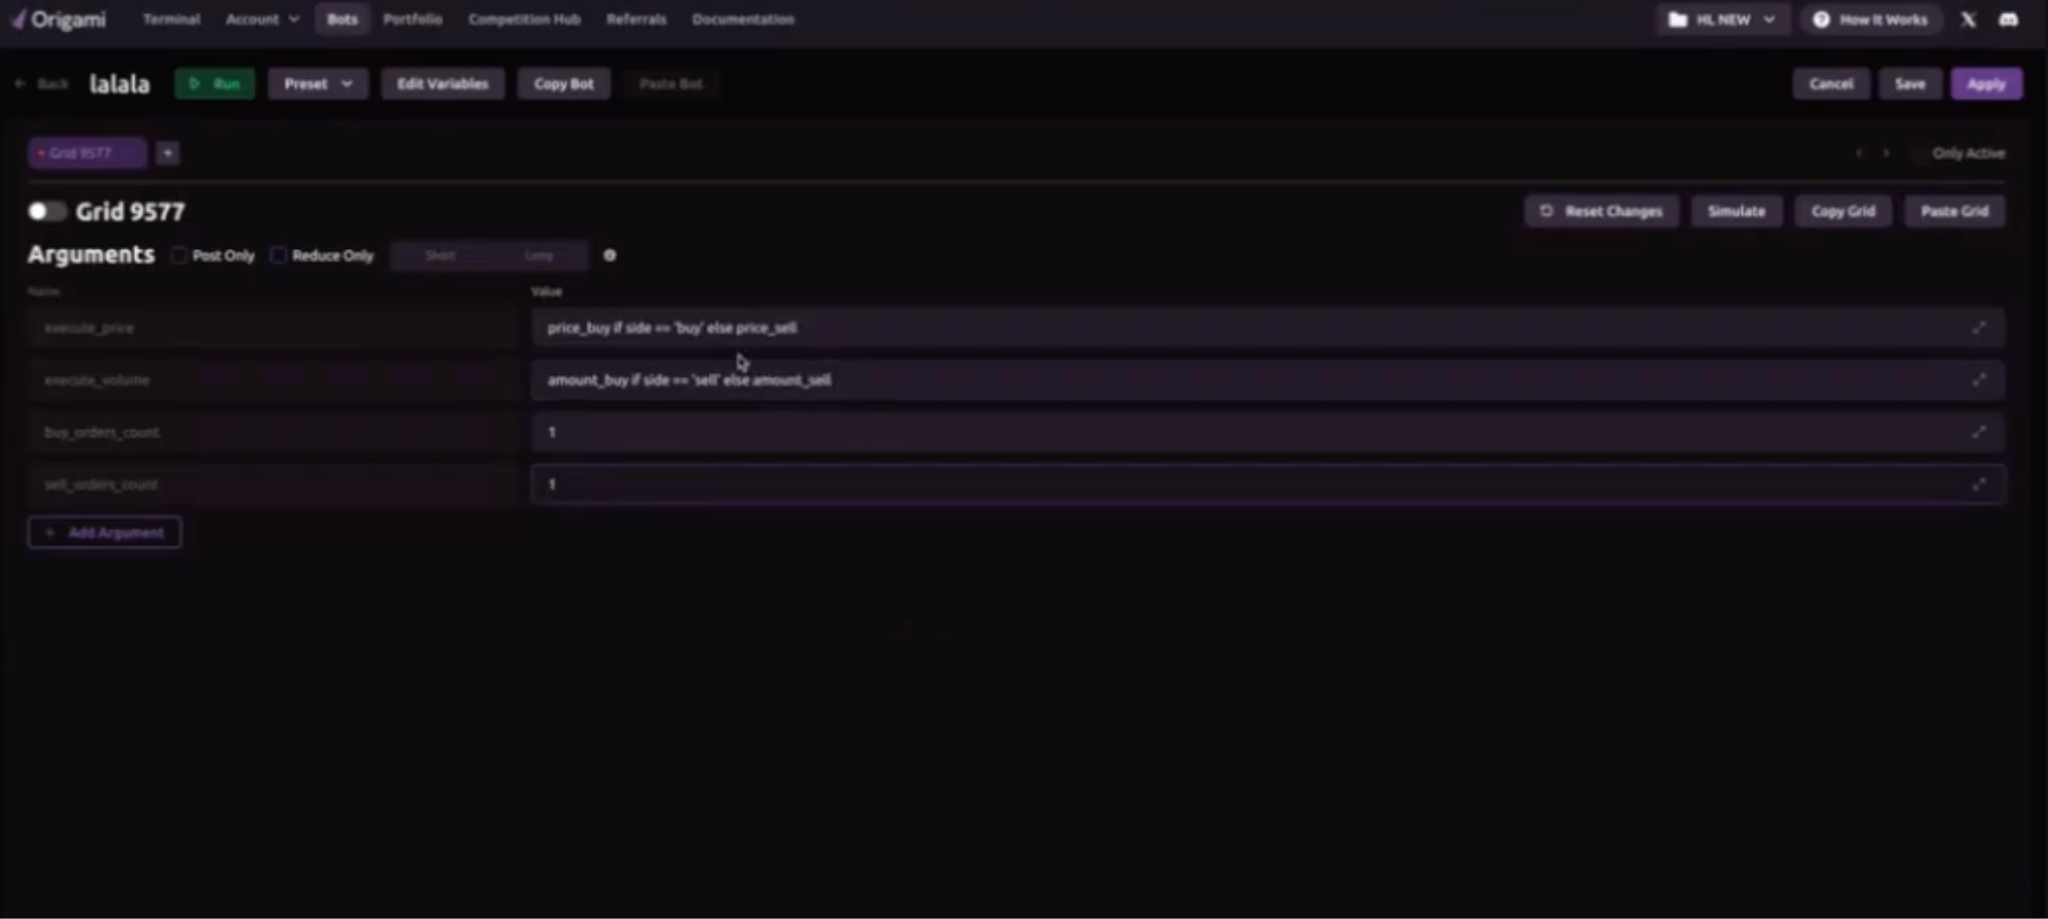
At this stage, the expressions may still produce undefined variable errors. That is expected until the candle, RSI, price, and amount variables are added.
Step 6: Add One Minute RSI Signals
Create a candles_ variable that references futures candles on the one minute interval using candles_futures('m1'). Defining the candle series once keeps the remaining expressions shorter and easier to review.
Then define two RSI thresholds:
- Long threshold: 30
- Short threshold: 70
Use the RSI calculation to identify the price associated with each threshold. The buy side should respond to the long threshold, while the sell side should respond to the short threshold.
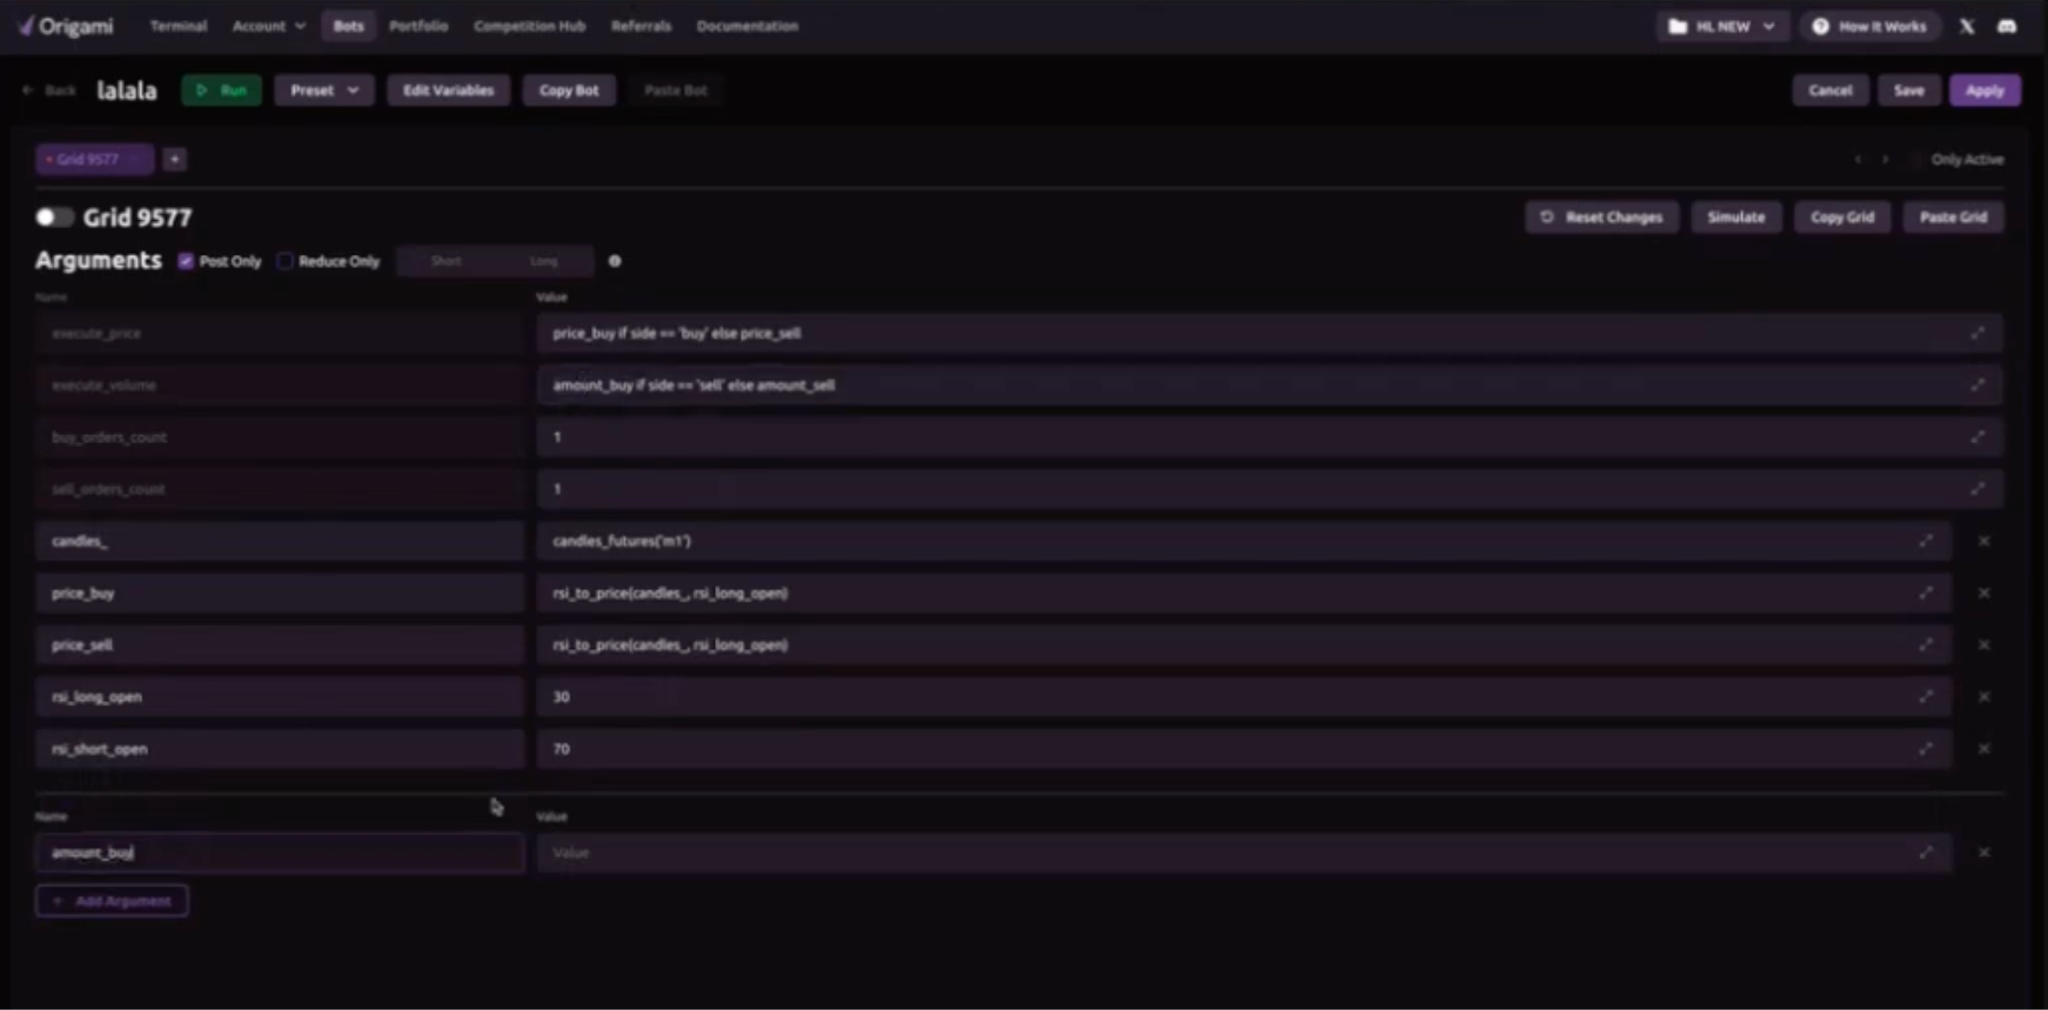
Be careful when duplicating expressions between sides. If the sell expression references the long threshold, Grid Simulation may show identical buy and sell prices. The buy expression must use the long threshold, while the sell expression must use the short threshold.
This is exactly why simulation should be reviewed after every meaningful change.
Step 7: Set Order Value and Calculate Quantity
The example defines quote_usd as 20, so each order represents approximately $20.
Origami Tech sends the amount as a number of tokens or contracts, not as a fixed dollar value. Calculate amount_buy as quote_usd / execute_price and apply the same calculation to amount_sell. The resulting quantity depends on the execute price. When the buy and sell prices differ, their quantities will also differ even though both orders represent the same approximate value.
After defining the amount variables, refresh Grid Simulation. You should see one buy order and one sell order with their calculated prices and quantities.
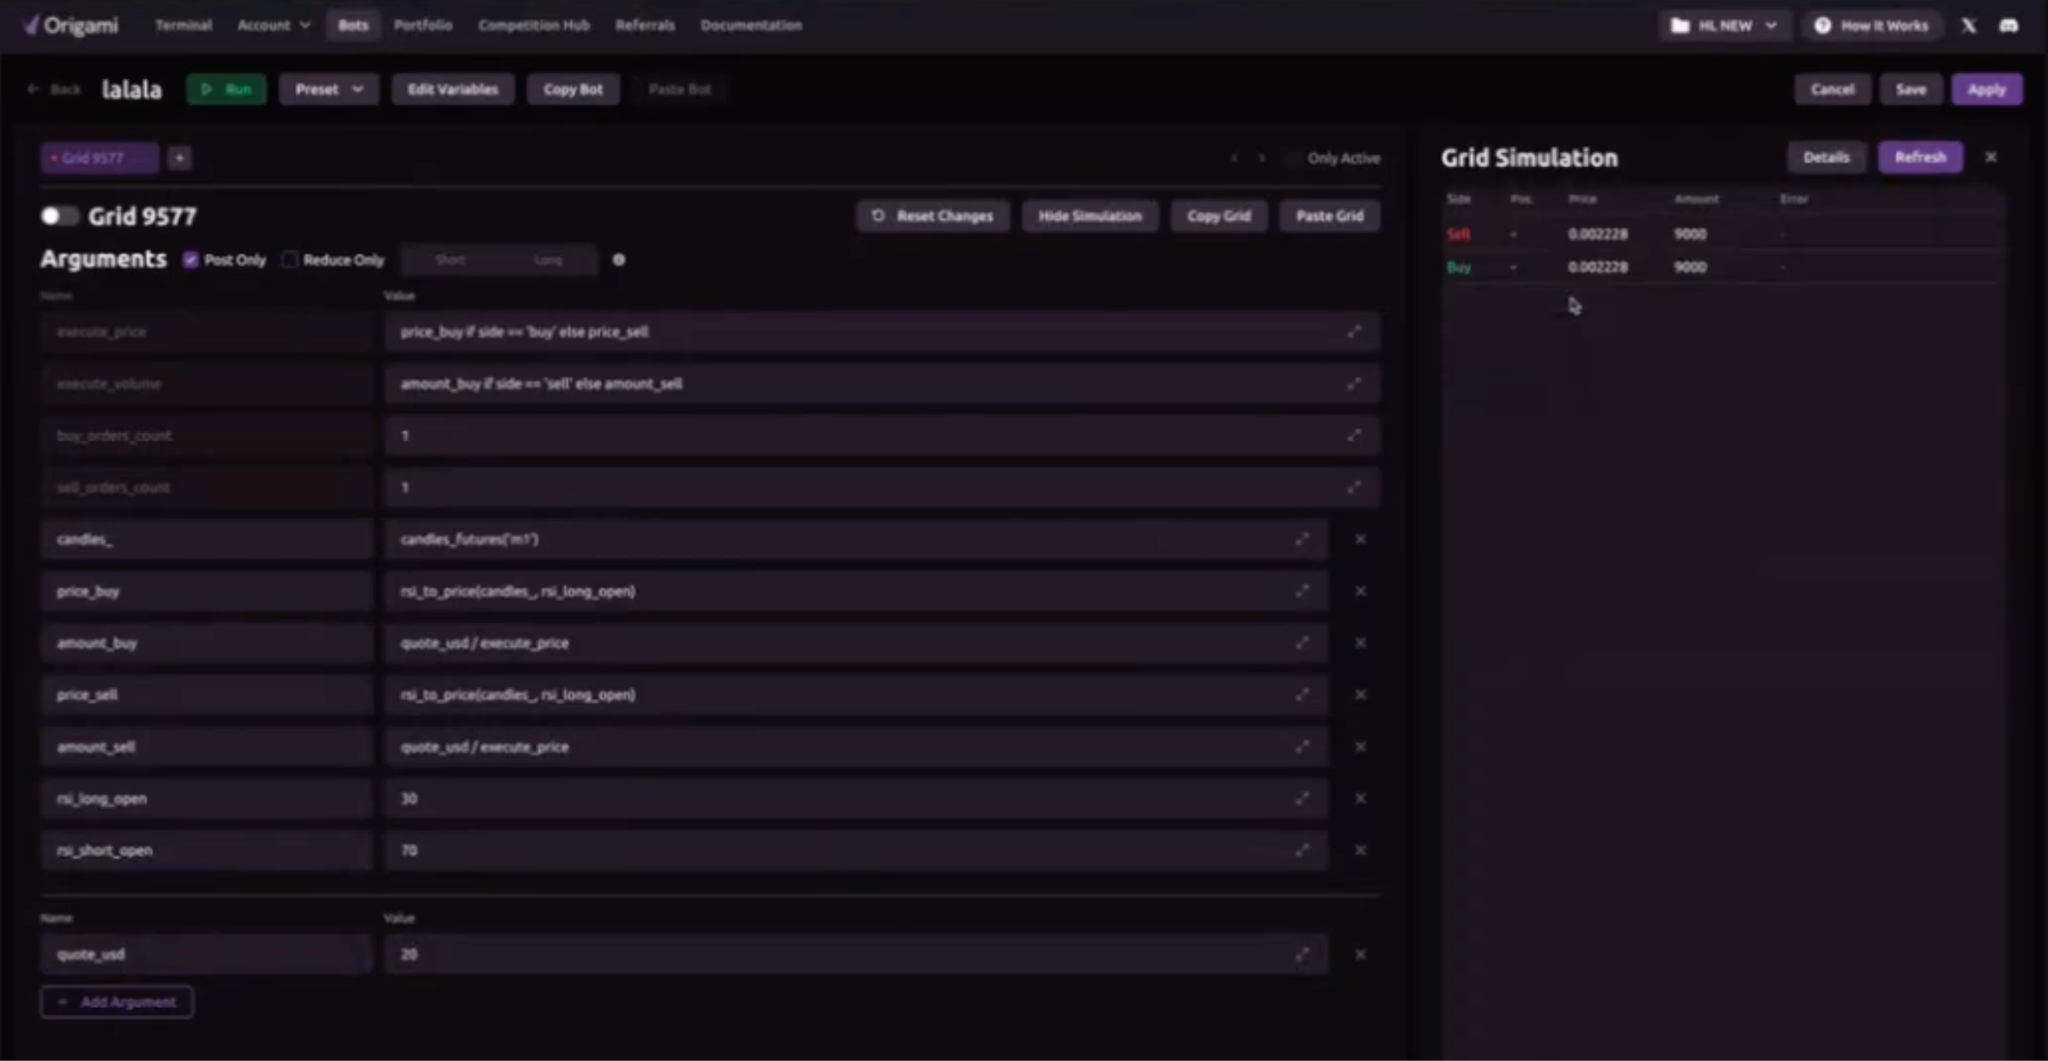
The layer can now produce orders, but it is not yet position aware. Without additional conditions, it may continue placing the same entry orders regardless of current exposure.
Step 8: Read the Current Position
Create the current position variable as position('one_way', 'cross'). The strategy then uses the available position quantity to determine whether no position, a long position, or a short position is currently open.
The strategy uses the available position quantity to distinguish between three states:
- Zero: no position is open
- Above zero: a long position is open
- Below zero: a short position is open
The price expressions check whether position_available_quantity == 0. When the condition is true, the bot uses the initial RSI entry logic. When it is false, the bot switches to the averaging logic around the position break even price.
This position check turns the first layer from a repeating signal generator into a position aware crypto grid trading bot.
Step 9: Constrain the Initial Entry with Order Book Data
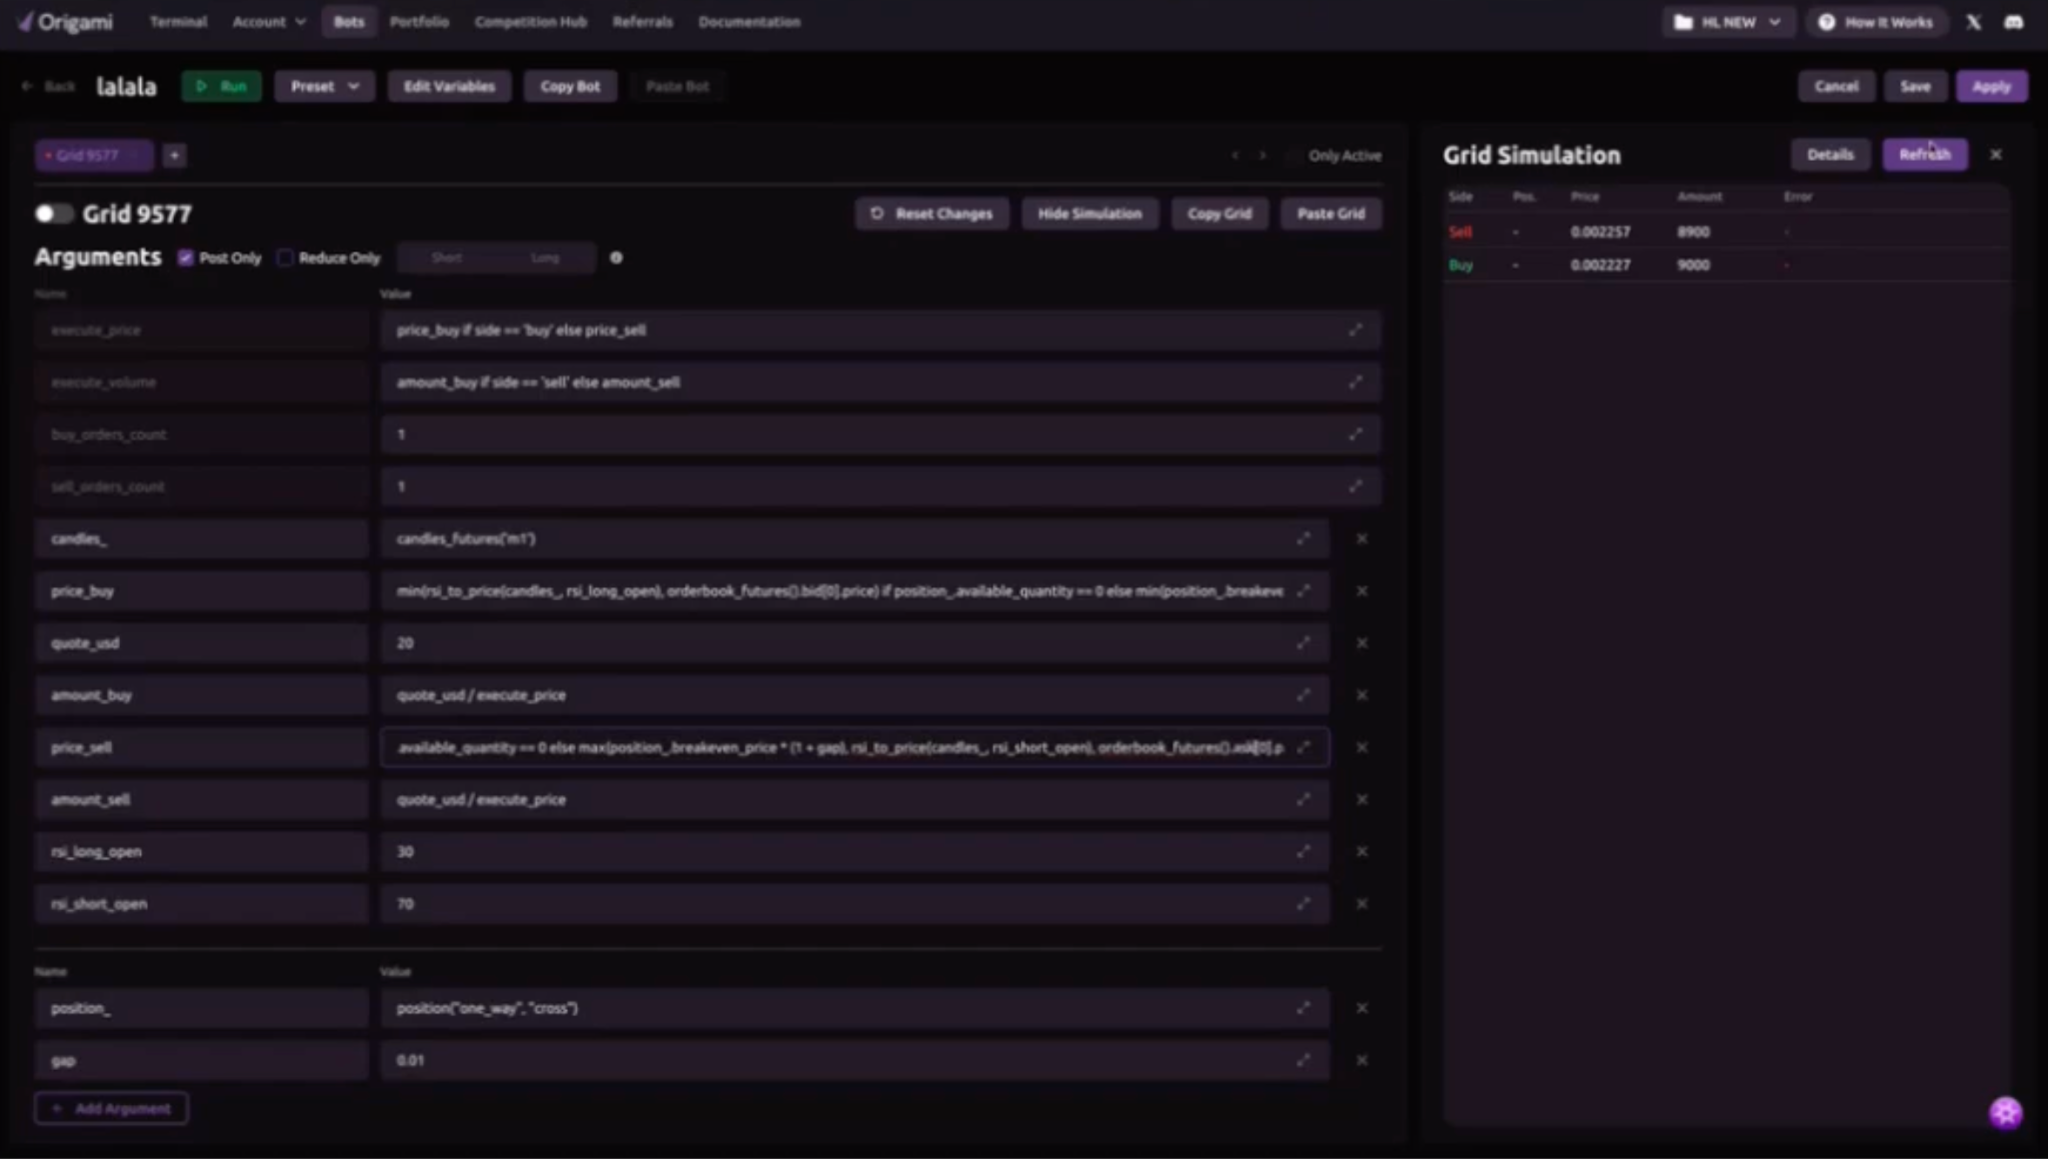
An RSI derived price may become unsuitable during a fast market movement. To avoid submitting an initial order at a less favorable level, combine the signal price with current order book data.
For the long side, compare the RSI based entry with the current best bid and use the more appropriate buy level. For the short side, apply the inverse logic using the current best ask.
This does not remove execution risk. It simply makes the entry logic aware of the live order book instead of relying only on the indicator price.
Step 10: Add Averaging Around the Break Even Price
If a position is already open, the first layer should stop using the original entry price and calculate its next order around the position break even price.
Set the averaging gap to 1%:
- For a long position, the next buy level is 1% below the break even price.
- For a short position, the next sell level is 1% above the break even price.
The relevant RSI condition must still be satisfied. A long averaging order therefore requires the long RSI condition, while a short averaging order requires the short RSI condition.
The order book constraint is applied again so the calculated price remains compatible with the current bid or ask.
Copy the Entry and Averaging Grid
The block below contains the complete entry and averaging grid. Enable Post Only and leave Reduce Only disabled.
execute_price = price_buy if side == 'buy' else price_sell
execute_volume = amount_buy if side == 'buy' else amount_sell
buy_orders_count = 1
sell_orders_count = 1
candles_ = candles_futures('m1')
price_buy = min(rsi_to_price(candles_, rsi_long_open), orderbook_futures().bid[0].price) if position_available_quantity == 0 else min(position_breakeven_price * (1 - gap), rsi_to_price(candles_, rsi_long_open), orderbook_futures().bid[0].price)
quote_usd = 20
amount_buy = quote_usd / execute_price
price_sell = max(rsi_to_price(candles_, rsi_short_open), orderbook_futures().ask[0].price) if position_available_quantity == 0 else max(position_breakeven_price * (1 + gap), rsi_to_price(candles_, rsi_short_open), orderbook_futures().ask[0].price)
amount_sell = quote_usd / execute_price
rsi_long_open = 30
rsi_short_open = 70
position_ = position('one_way', 'cross')
gap = 0.01
Averaging increases exposure and may increase losses if the market continues moving against the position. Averaging frequency alone does not define a complete grid trading strategy. Position limits, available balance, liquidation risk, fees, and market conditions must also be considered.
Step 11: Add a Reduce Only Closing Layer
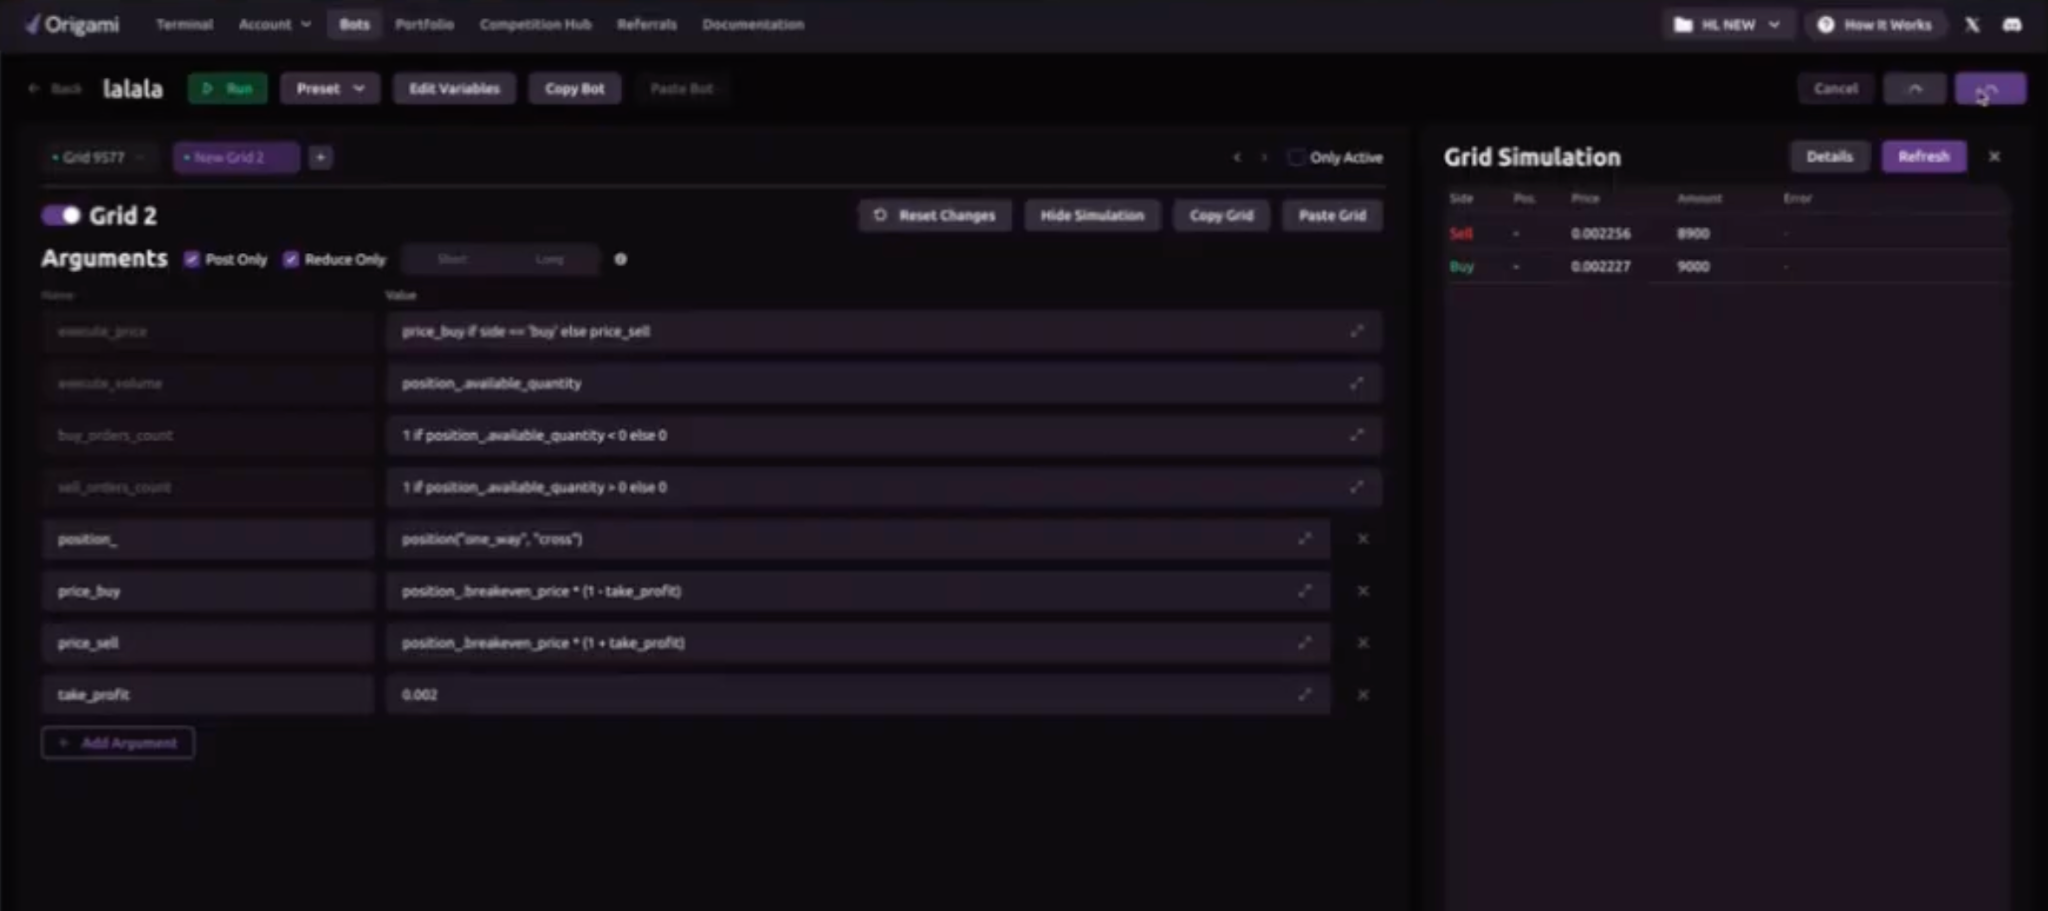
The first layer now handles initial entries and averaging, but it does not close profitable positions. Add a second grid layer for exits and enable Reduce Only.
The closing layer should place orders only when a position exists:
- If the position quantity is below zero, the bot may place a buy order to close the short position.
- If the position quantity is above zero, the bot may place a sell order to close the long position.
- If the position quantity is zero, the layer should not place an order.
Calculate the exit price from the position break even price and a configurable profit target expressed as a decimal. Set take_profit to 0.002, which represents 0.2%.
For a long position, calculate the sell price as break even price × (1 + take_profit). For a short position, calculate the buy price as break even price × (1 - take_profit). Configure the amount so the order closes the full available position.
Reduce Only is essential here. Without it, an oversized or repeated closing order could move the account from a closed position into a new position on the opposite side.
Copy the Reduce Only Closing Grid
Enable both Post Only and Reduce Only for this layer.
execute_price = price_buy if side == 'buy' else price_sell
execute_volume = position_available_quantity
buy_orders_count = 1 if position_available_quantity < 0 else 0
sell_orders_count = 1 if position_available_quantity > 0 else 0
position_ = position('one_way', 'cross')
price_buy = position_breakeven_price * (1 - take_profit)
price_sell = position_breakeven_price * (1 + take_profit)
take_profit = 0.002
Step 12: Review Grid Simulation
Refresh Grid Simulation before saving the bot.
Check the following:
- The first layer returns no more than one buy and one sell order.
- The buy side uses the long RSI threshold.
- The sell side uses the short RSI threshold.
- The order values are converted into the expected contract quantities.
- Initial entries appear only when no position exists.
- Averaging prices are calculated from the break even price.
- The long and short sides use the correct bid or ask data.
- The closing layer acts only when a position exists.
- The exit amount matches the full position quantity.
- Reduce Only is enabled for the closing layer.
Simulation represents what the layer would return at the current moment. It helps detect undefined variables, duplicated conditions, incorrect sides, and unexpected prices before the bot is started. It does not predict future crypto trading bot returns.
Step 13: Save and Run the Bot
When both layers return the intended outputs, save the configuration and click Run Bot.
Open the Terminal and switch to the bot view. The active orders should appear on the chart and in the orders table, where you can review their price, quantity, and value.
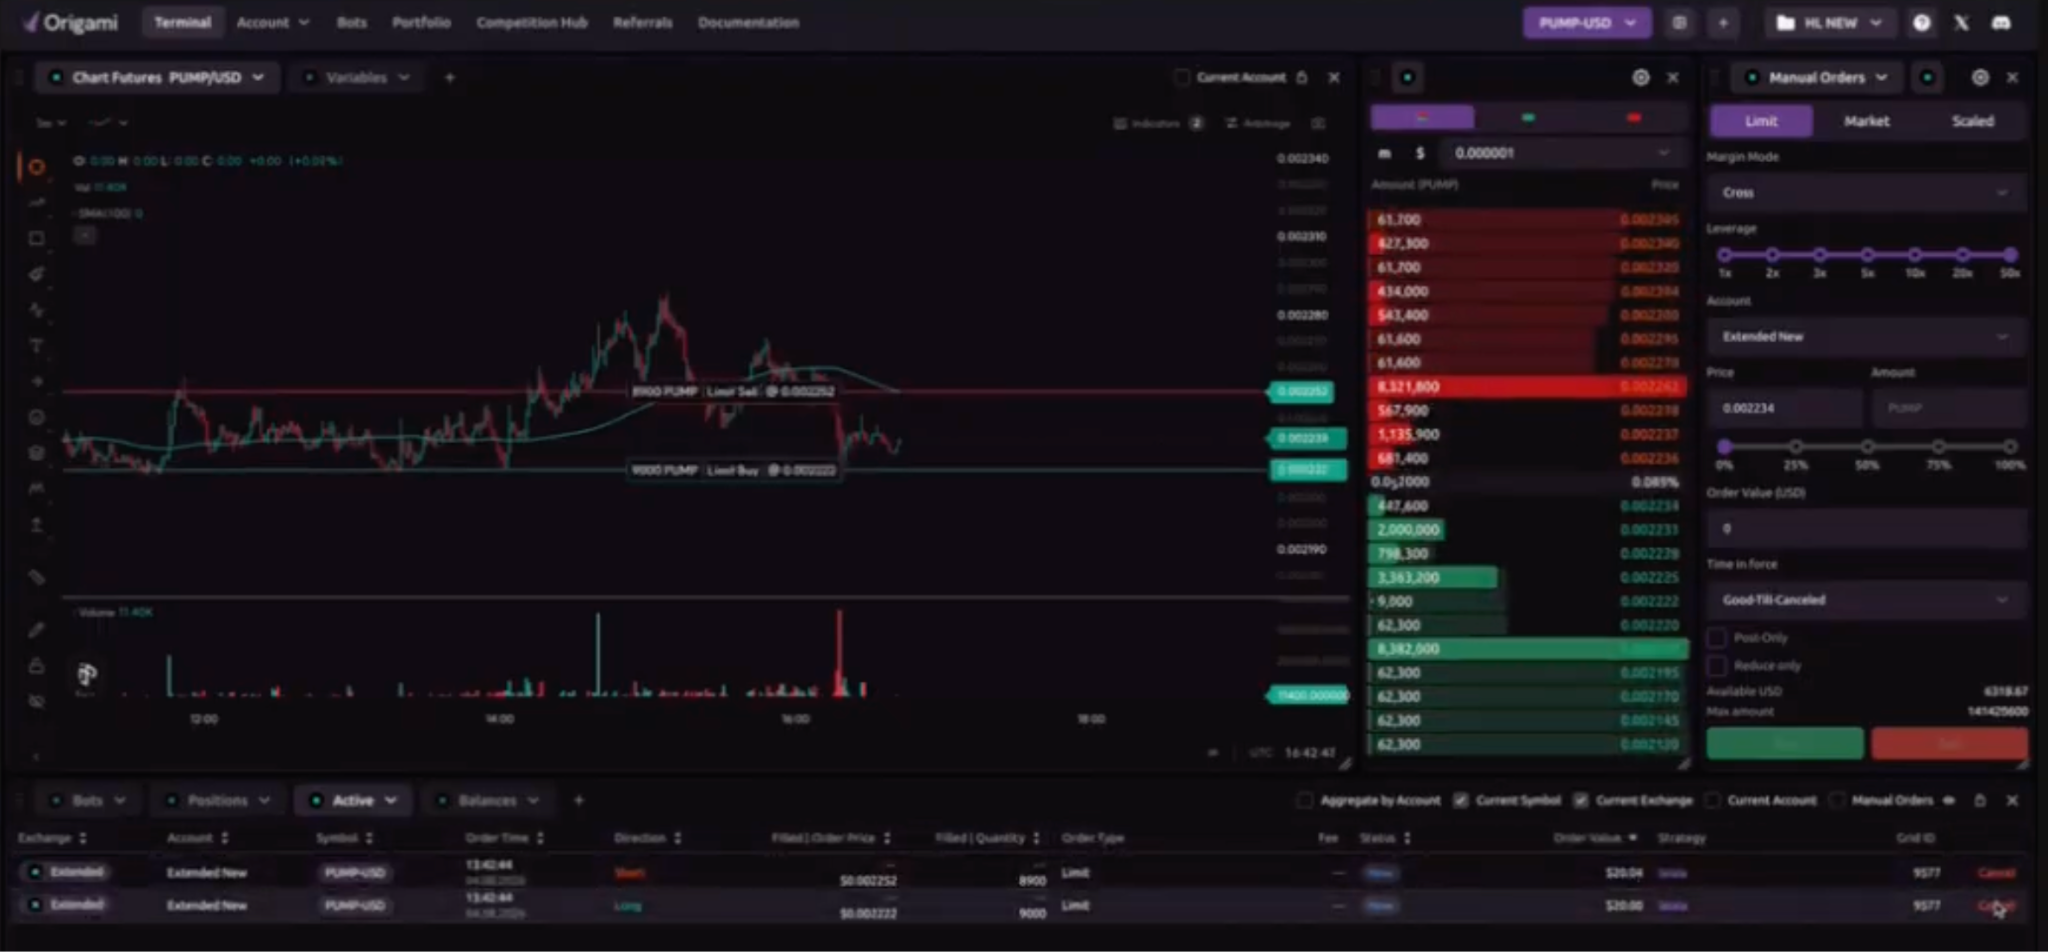
If an order generated by the strategy is manually cancelled, the bot may place it again while its conditions remain valid. Stop or adjust the relevant layer if you do not want the order to be recreated.
Continue monitoring the position, active orders, available balance, fees, and bot status after launch. Automation removes repeated manual actions, but it does not remove the need for supervision.
Conclusion
This futures crypto trading bot separates the complete position cycle into two grid layers.
The first layer reads one minute RSI data, prepares long and short entries, and moves into averaging logic when a position already exists. The second layer uses the break even price and a configurable profit target to close the full position in Reduce Only mode.
The resulting workflow is easier to inspect than a single large expression because opening, averaging, and closing rules remain logically separated. Grid Simulation then provides a final check of the orders each layer would return before the bot goes live.
Use the example as a starting structure, not as a finished recommendation. Adjust the market, thresholds, order value, averaging gap, profit target, leverage, and risk limits to match your own testing and account conditions.
You may also like
.jpeg)





Trade Smarter with Origami Tech
Take your crypto trading to the next level with our powerful automated trading terminal. Maximize profits, minimize risks, and stay ahead of the market 24/7.